Nextcloud
Zur Navigation springen
Zur Suche springen
Download
- um zu starten wechseln wir ins Verzeichnis /tmp
- dann nutzen wir "curl" um Nextcloud downzuloaden (Stand Ubuntu 16.04.3)
wget https://download.nextcloud.com/server/releases/latest.tar.bz2
Installation
- Zunächst wird nextcloud auf dem Server installiert, dazu entpacken wir die Datei in das Verzeichnis /var/www
unzip nextcloud-13.0.1.zip && mv nextcloud /var/www/
- Danach erstellen wir für Nextcloud ein Script, dass wir mit dem nano editor erstellen
vi /tmp/nextcloud.sh
#!/bin/bash
ocpath='/var/www/nextcloud'
htuser='www-data'
htgroup='www-data'
rootuser='root'

printf "Creating possible missing Directories\n"
mkdir -p $ocpath/data
mkdir -p $ocpath/assets
mkdir -p $ocpath/updater

printf "chmod Files and Directories\n"
find ${ocpath}/ -type f -print0 | xargs -0 chmod 0640
find ${ocpath}/ -type d -print0 | xargs -0 chmod 0750
chmod 755 ${ocpath}

printf "chown Directories\n"
chown -R ${rootuser}:${htgroup} ${ocpath}/
chown -R ${htuser}:${htgroup} ${ocpath}/apps/
chown -R ${htuser}:${htgroup} ${ocpath}/assets/
chown -R ${htuser}:${htgroup} ${ocpath}/config/
chown -R ${htuser}:${htgroup} ${ocpath}/data/
chown -R ${htuser}:${htgroup} ${ocpath}/themes/
chown -R ${htuser}:${htgroup} ${ocpath}/updater/

chmod +x ${ocpath}/occ

printf "chmod/chown .htaccess\n"
if [ -f ${ocpath}/.htaccess ]
 then
  chmod 0644 ${ocpath}/.htaccess
  chown ${rootuser}:${htgroup} ${ocpath}/.htaccess
fi
if [ -f ${ocpath}/data/.htaccess ]
 then
  chmod 0644 ${ocpath}/data/.htaccess
  chown ${rootuser}:${htgroup} ${ocpath}/data/.htaccess
fi
- Nun starten wir das Skript mit dem bash befehl:
root@nextcloud:/tmp# sudo bash /tmp/nextcloud.sh
Creating possible missing Directories
chmod Files and Directories
chown Directories
chmod/chown .htaccess
- Als nächstes installieren wir apache2
apt-get install apache2
- Danach öffnen wir wieder ein nano script im Verzeichnis /etc/apache2/sites-available/ und nennen es nextcloud.conf
vi /etc/apache2/sites-available/nextcloud.conf
Alias /nextcloud "/var/www/nextcloud/"

<Directory /var/www/nextcloud/>
    Options +FollowSymlinks
    AllowOverride All

    <IfModule mod_dav.c>
        Dav off
    </IfModule>

    SetEnv HOME /var/www/nextcloud
    SetEnv HTTP_HOME /var/www/nextcloud

</Directory>
- Um die Seite von available zu enabled zu ändern nutzen wir den befehl
root@nextcloud:/etc/apache2/sites-available# sudo a2ensite nextcloud
Enabling site nextcloud.
- Zusätzlich, zum Aktivieren der Website, verwenden wir den Befehl a2enmod, um das mod_rewrite Apache-Modul zu aktivieren
root@nextcloud:/etc/apache2/sites-available# sudo a2enmod rewrite
Enabling module rewrite.
- Zuletzt, bevor wir Apache neu starten, installieren wir noch notwendige module
apt-get update
apt-get install libxml2-dev php php-gettext php-pear php-dompdf php-apcu php-imagick
apt-get install  php7.2-fpm php7.2-gd php7.2-mysql php7.2-curl php7.2-xml php7.2-zip php7.2-bz2 php7.2-intl php7.2-mcrypt php7.2-mbstring php7.2-json php7.2-xsl php7.2-bcmath php7.2-cgi php7.2-cli php7.2-common  php7.2-imap php-ldap
- Jetzt können wir Apache neu starten
systemctl restart apache2.service
MySQL Datenbank erstellen
- Installieren mit
apt-get install mysql-server
- Nun loggen wir uns mit dem root Passwort ein
mysql -u root -p
- und erstellen eine Datenbank für Nextcloud
CREATE DATABASE nextcloud;
- dazu erstellen wir noch einen separaten user
GRANT ALL ON nextcloud.* to 'nextcloud'@'localhost' IDENTIFIED BY 'set_database_password';
- um sicherzustellen, dass die laufende Instanz von MySQL über die aktuelle Privileg-Zuweisung weiß, führen wir den folgenden Befehl aus
FLUSH PRIVILEGES;
- Jetzt können wir MySQL verlassen
MySQL Konfigurieren
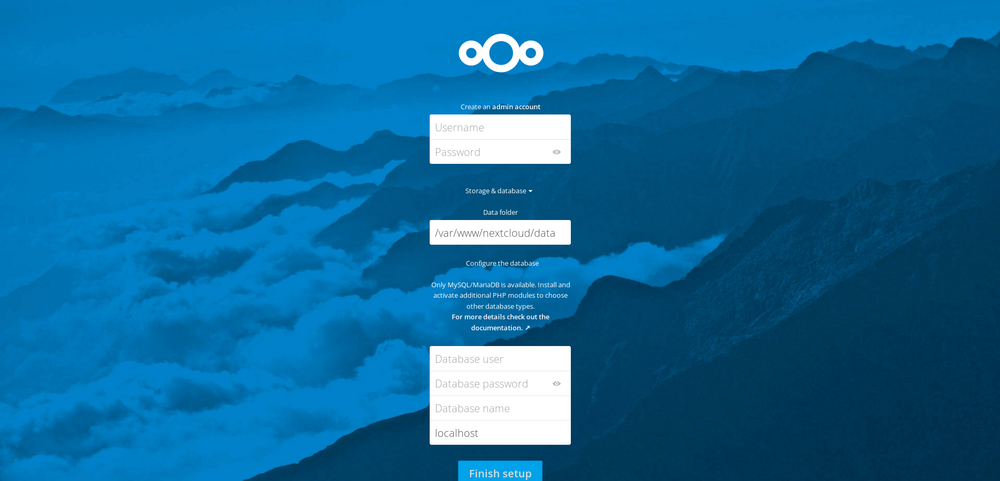
- Als letztes muss Nextcloud noch konfiguriert werden. Dazu greifen wir über das Webinterface zu
https://server_domain_oder_IP/nextcloud
LDAP anbinden
- Zu erst LDAP aktivieren, dazu gehen wir auf Apps und dann auf Deinstallierte Apps, dort müsste "LDAP user and group backend" stehen und dann einfach auf aktivieren gehen
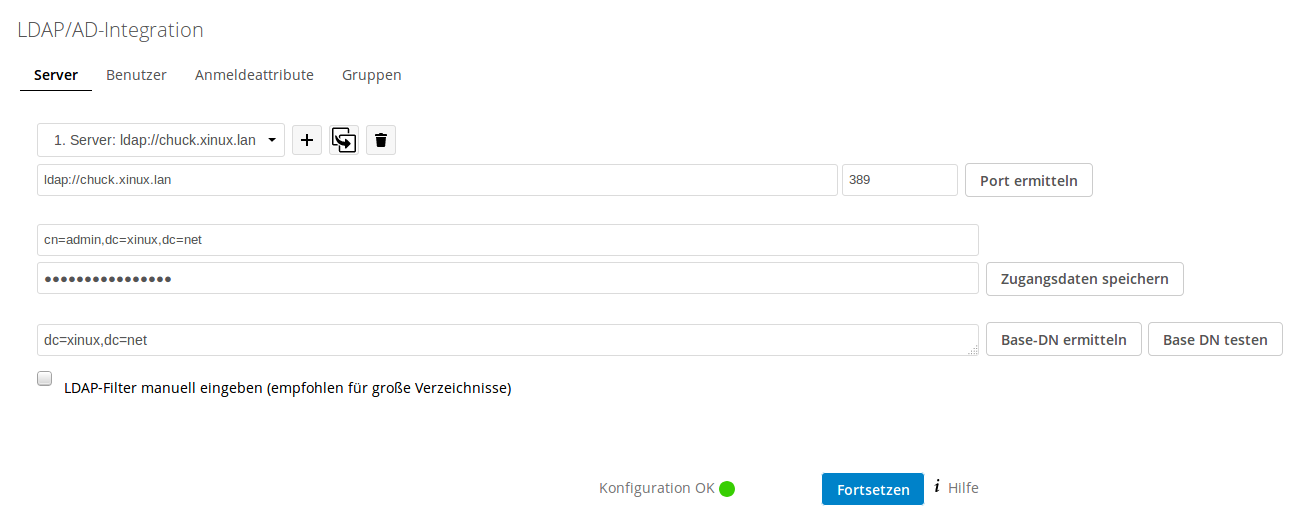
- Wenn das getan ist gehen wir auf Einstellungen und dann auf LDAP/AD-Integration
Server
Bei Server tragen wir den gewünschten LDAP-Server ein
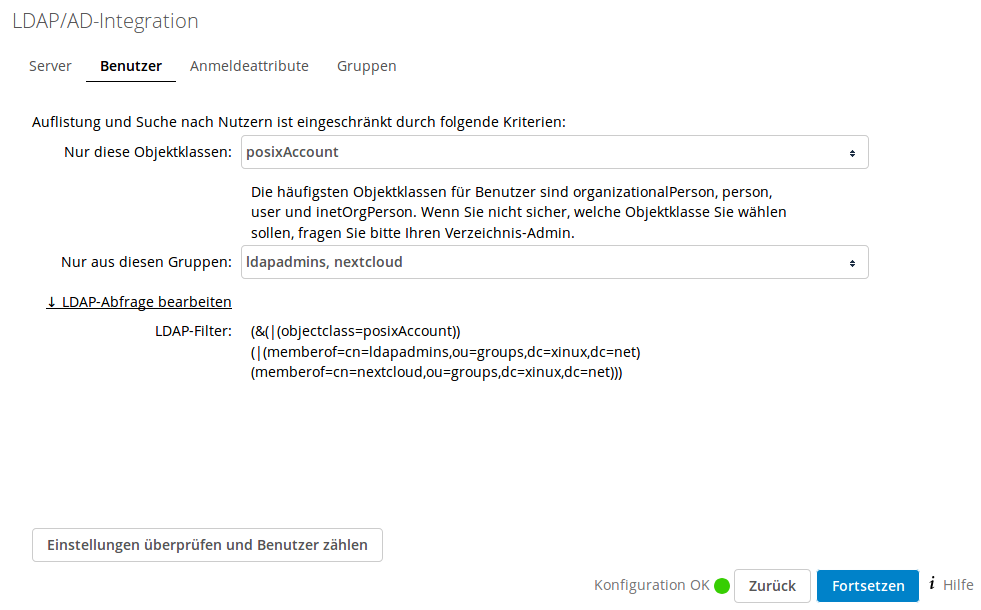
Benutzer
- Bei Benutzer wählen wir welche Objektklasse wir auswählen wollen und in welcher LDAP-Gruppe gesucht werden soll
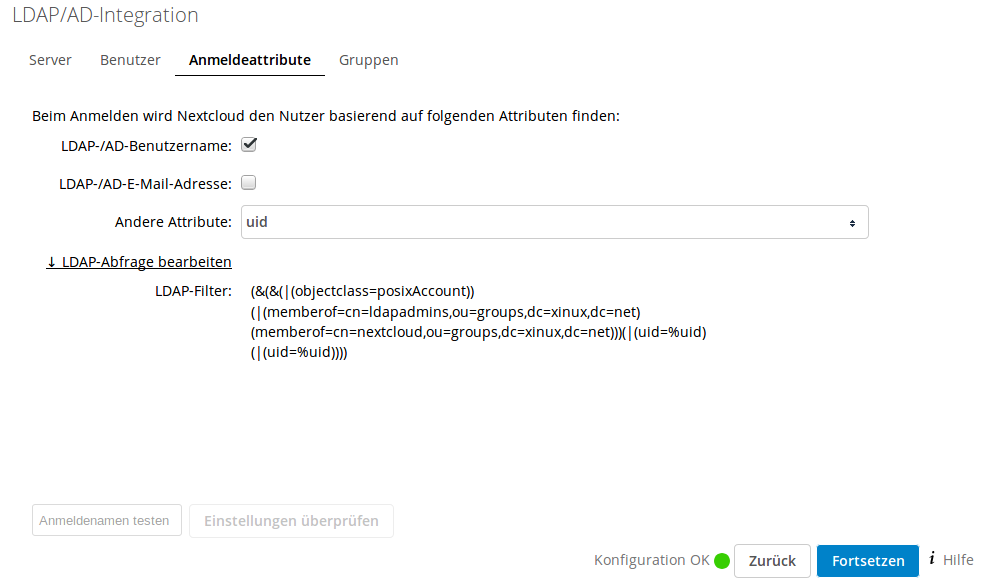
Anmeldeattribute
- Bei Anmeldeattribute wählen wir aus mit welchen Attributen Nextcloud den Benutzer finden soll
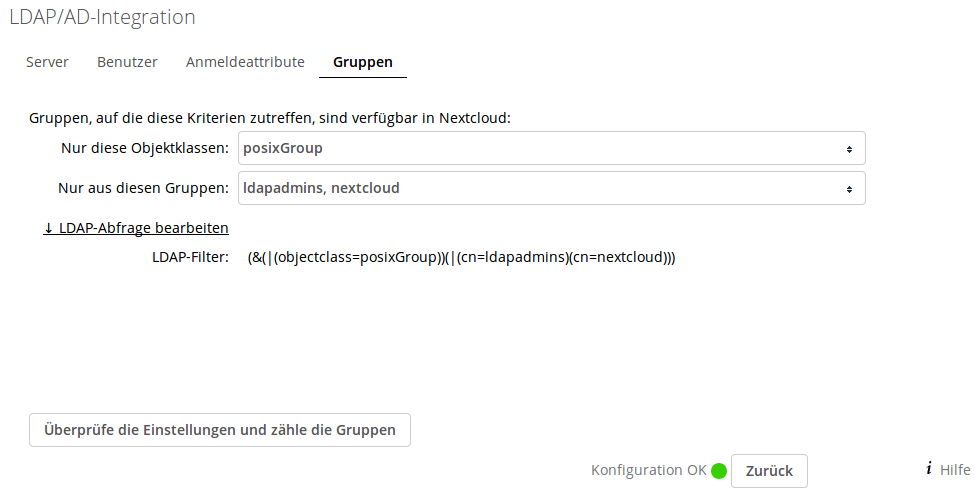
Gruppen
- Bei Gruppen wählen wir aus welche Gruppen Verfügbar sind, die auf diese Kriterien zutreffen
Kalendar
Database lock
- mysql -u root -p
use nextcloud;
DELETE FROM oc_file_locks WHERE 1;
quit
