S/MIME Zertifikat Thunderbird Neu: Unterschied zwischen den Versionen
Zur Navigation springen
Zur Suche springen
| (2 dazwischenliegende Versionen desselben Benutzers werden nicht angezeigt) | |||
| Zeile 5: | Zeile 5: | ||
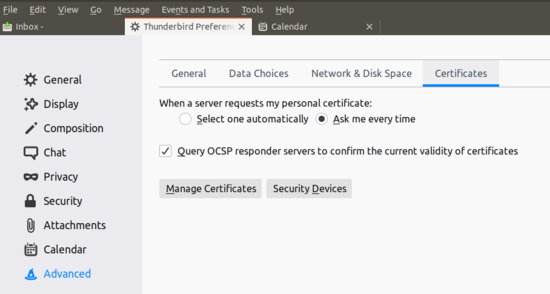
Edit -> Preferences -> Advanced -> Manage Certificates | Edit -> Preferences -> Advanced -> Manage Certificates | ||
| − | [[Datei:thunderbird-cert-import.png]] | + | [[Datei:thunderbird-cert-import.png|550px]] |
| − | [[Datei:thunderbird-cert-import1.png]] | + | [[Datei:thunderbird-cert-import1.png|550px]] |
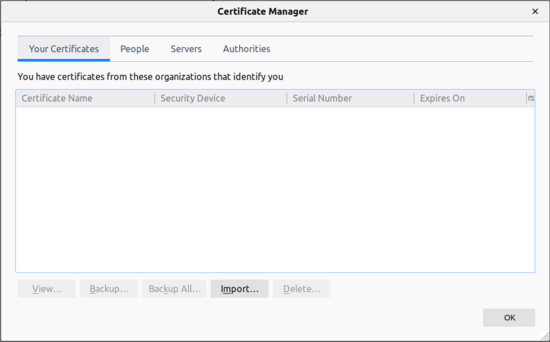
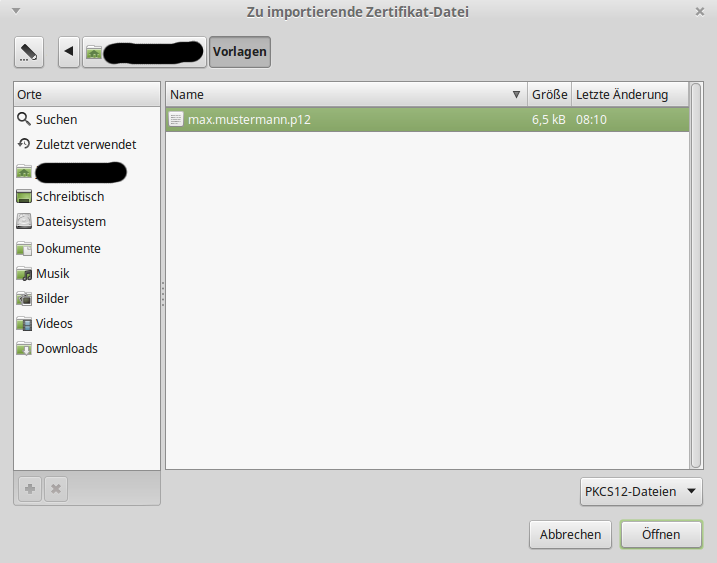
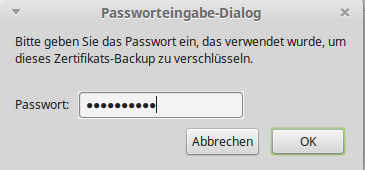
Import -> select .p12 -> open -> enter password -> ok | Import -> select .p12 -> open -> enter password -> ok | ||
| Zeile 23: | Zeile 23: | ||
Edit -> Account Settings -> Security | Edit -> Account Settings -> Security | ||
| − | [[Datei:thunderbird-cert-use.png | | + | [[Datei:thunderbird-cert-use.png | 550px]] |
| − | [[Datei:thunderbird-cert-use1.png | | + | [[Datei:thunderbird-cert-use1.png | 550px]] |
| − | [[Datei:thunderbird-cert-use2.png | | + | [[Datei:thunderbird-cert-use2.png | 550px]] |
=How to send encrypted Messages= | =How to send encrypted Messages= | ||
==Digitally sign Mail== | ==Digitally sign Mail== | ||
*Write -> Under '''Security''' -> Select '''Digitally Sign This Message''' | *Write -> Under '''Security''' -> Select '''Digitally Sign This Message''' | ||
| − | [[Datei: | + | [[Datei:thunderbird-top.png]] |
*The following symbol appears at the bottom right corner. | *The following symbol appears at the bottom right corner. | ||
[[Datei:comodo-18.png]] | [[Datei:comodo-18.png]] | ||
| Zeile 39: | Zeile 39: | ||
==Sending encrypted messages== | ==Sending encrypted messages== | ||
*Write -> Under '''Security'''-> Select '''Encrypt This Message''' | *Write -> Under '''Security'''-> Select '''Encrypt This Message''' | ||
| − | [[Datei: | + | [[Datei:thunderbird-top.png]] |
*The following symbol appears at the bottom right corner. | *The following symbol appears at the bottom right corner. | ||
[[Datei:comodo-19.png]] | [[Datei:comodo-19.png]] | ||
Aktuelle Version vom 19. Februar 2020, 08:43 Uhr
Get Certificate
Import Certificate in Thunderbird
Edit -> Preferences -> Advanced -> Manage Certificates
Import -> select .p12 -> open -> enter password -> ok
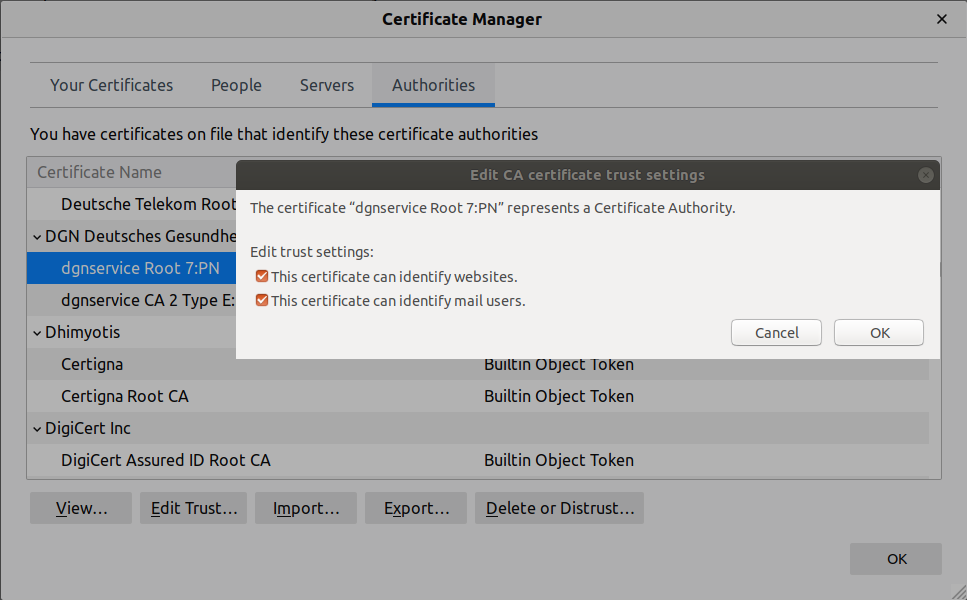
Edit Authorities
Authorities Tab -> search for your CA (DGN in our case) -> Edit Trust for every point under your CA -> Check This certificate can identify websites. and This certificate can identify mail users.
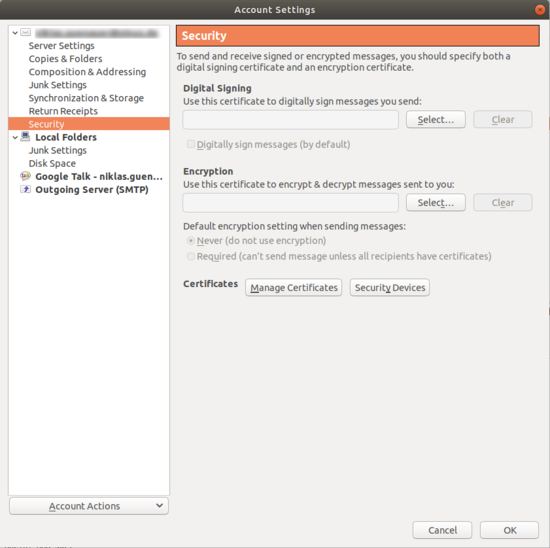
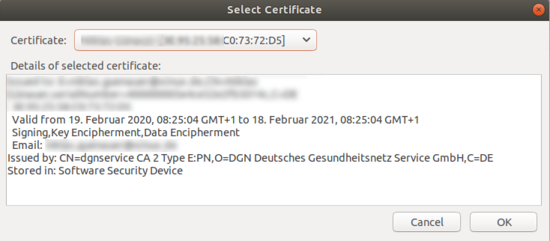
Select imported Certificate
Edit -> Account Settings -> Security
How to send encrypted Messages
Digitally sign Mail
- Write -> Under Security -> Select Digitally Sign This Message
- The following symbol appears at the bottom right corner.
- After the recipient has received the first digitally signed mail, he or she has also received the certificate and thus the public key of the sender. Subsequently, further messages to the same recipient can be encrypted.
Sending encrypted messages
- Write -> Under Security-> Select Encrypt This Message
- The following symbol appears at the bottom right corner.
